Thursday, May 19, 2016

Using a Dynamic Alarm to Rescan Unavailable Datastores

Hi All,

So in our particular retail environment we have had an ongoing issue with Iscsi datastore availability in the case of a power outage.   We also have the same problem on in store deployments when the onsite technicians power on the components in the wrong order (ie power on the hosts before the iscsi array).   The result of this problem was of course escalations for retail stores being down for a significant period of time following a power outage.

Of course I googled the heck out of this problem -  and the only solution I have found was to change the boot delay on the ESXi hosts to exceed the array boot time.  That was not a great solution for us -  because it would delay starts on planned reboots without a corresponding power outage.

One day I was working on another reactive alarm and I got that light bulb over my head.   I thought "I wonder if there is an alarm type for datastore connectivity to hosts that I could use to trigger an action?".   It turns out there is a condition that can be monitored at the datastore level to alarm for this -  it is called Datastore State to All Hosts. In the screenshots below -   I created a custom rule with this condition.   For a review on setting up Powercli based alarms -  refer to my blog post here.


Now that we have the alarm setup  -   let's get into the Powercli code behind it.  In our particular implementation -  we only have to worry about 3 nodes in our clusters,  so my script is focused on that,   the methodology would also work with a larger cluster and a foreach-object loop -  but I am just going to use my already written script to show how I solved my particular problem, but the logic will scale.
# In response to a datastore alarm, remove all snapshots on the datastore.
# This is just for demonstration purposes.
# Find more info at http://blogs.vmware.com/vipowershell
$basePath = "C:\Documents and Settings\All Users\Application Data\VMware\VMware VirtualCenter\scripts"
$ProgressPreference = "SilentlyContinue"
$env:APPDATA = "c:\Documents and Settings\All Users\Application Data"

Add-PSSnapin VMware.Vimautomation.Core -ea SilentlyContinue
$WarningPreference = "SilentlyContinue"
Connect-VIServer localhost -User "nobody\someone" -Password "xxxxxxxxxxxxxxxxxxxxxx" | Out-Null
$email = "jason.willey@gmail.com"
$datastoreId = "Datastore" + $env:VMWARE_ALARM_TARGET_ID
$datastore = Get-Datastore $datastoreId
$impactedhosts = $datastore |get-vmhost
$cluster = $impactedhosts |select -First 1 |get-cluster 
# host one check
$Hostone = $impactedhosts |where {$_.name -match "x1"}  
$Hostoneconnected = $Hostone.ConnectionState
$hostonestate = get-vmhost $hostone |get-datastore $datastore
$hostonestate = $hostonestate.Accessible
if ($Hostoneconnected -match "connected") {
$hostonestate = get-vmhost $hostone |get-datastore $datastore
$global:hostonestate = $hostonestate.Accessible }
#host two check
$Hosttwo = $impactedhosts |where {$_.name -match "x2"}  
$Hosttwoconnected = $Hosttwo.ConnectionState
if ($Hosttwoconnected -match "connected") {
$hosttwostate = get-vmhost $hosttwo |get-datastore $datastore
$global:hosttwostate = $hosttwostate.Accessible }
# Host Three check
$Hostthree = $impactedhosts |where {$_.name -match "x3"}  
$Hostthreeconnected = $Hostthree.ConnectionState
if ($Hostthreeconnected -match "connected") {
$hostthreestate = get-vmhost $hostthree |get-datastore $datastore
$global:hostthreestate = $hostthreestate.Accessible}
#  starting rescan loop
$global:counter = 0 
while ($global:hostonestate -match "False" -or $globalhosttwostate -match "False" -or $global:hostthreestate -match "False" -and $counter -lt 10 {
if ($global:Hostonestate -match "False") {Get-VMHostStorage -VMHost $Hostone -RescanAllHba -RescanVmfs |Out-Null
 $global:hostonestate = get-vmhost $hostone |get-datastore $datastore;
 $global:hostonestate = $$global:hostonestate.Accessible  }
if ($global:Hosttwostate -match "False") {Get-VMHostStorage -VMHost $Hosttwo -RescanAllHba -RescanVmfs |Out-Null
 $global:hosttwostate = get-vmhost $hosttwo |get-datastore $datastore;
 $global:hosttwostate = $global:hosttwostate.Accessible  }
if ($global:Hostthreestate -match "False") {Get-VMHostStorage -VMHost $Hostthree -RescanAllHba -RescanVmfs |Out-Null
 $$global:hostthreestate = get-vmhost $hostthree |get-datastore $datastore;
 $global:hostthreestate = $global:hostthreestate.Accessible  } 
sleep 120
$global:counter = $global:counter + 1
if $counter -eq 9 { $global:hosterror = "$datastore has been rescanned every 2 minutes for 20 minutes and is not available on all nodes of $cluster"

}
if ($globbal:hosterror -ne $null) {Send-MailMessage -To $email -Subject "Unable to rescan ISCSI storage in cluster $cluster" -Bodyashtml -Body "$global:hosterror"  -SmtpServer "m.nobody.com" -From "VMware@nobody.com"}


So I will skip all the logic for interpreting the alarm received as that is detailed in another post here.

First things first - I translate the actual datastore ID presented by the alert to a more script friendly datastore name and get the hosts that are supposed to be connected to this datastore. I also get the cluster name for use later on when we send an email alert in the case we were unable to successfully rescan.
$datastoreId = "Datastore" + $env:VMWARE_ALARM_TARGET_ID
$datastore = Get-Datastore $datastoreId
$impactedhosts = $datastore |get-vmhost
$cluster = $impactedhosts |select -First 1 |get-cluster 
From there - I now verify that each host is actually connected to vcenter, and verify if the datastore is viewed as available from the host side. I then repeat this logic for each possible host.
$Hostone = $impactedhosts |where {$_.name -match "x1"}  
$Hostoneconnected = $Hostone.ConnectionState
$hostonestate = get-vmhost $hostone |get-datastore $datastore
$hostonestate = $hostonestate.Accessible
if ($Hostoneconnected -match "connected") {
$hostonestate = get-vmhost $hostone |get-datastore $datastore
$global:hostonestate = $hostonestate.Accessible }
Now I set up the rescanning loop. In the case of our environment we have chosen to rescan every two minutes for twenty minutes and then send an email alert to second level support. I used $global: variables here so they will survive the loop. So after the rescan, it checks the status of the datastore again, and continues running the loop until all the datastores have returned, or the loop counter reaches 10. At the end of each pass of the loop there is a 120 second sleep to give us our two minutes between rescans. One the last iteration of the loop - it writes an error message that after 20 minutes of 2 minute rescans - the cluster still has a datastore availability problem.
$global:counter = 0 
while ($global:hostonestate -match "False" -or $globalhosttwostate -match "False" -or $global:hostthreestate -match "False" -and $counter -lt 10 {
if ($global:Hostonestate -match "False") {Get-VMHostStorage -VMHost $Hostone -RescanAllHba -RescanVmfs |Out-Null
 $global:hostonestate = get-vmhost $hostone |get-datastore $datastore;
 $global:hostonestate = $$global:hostonestate.Accessible  }
if ($global:Hosttwostate -match "False") {Get-VMHostStorage -VMHost $Hosttwo -RescanAllHba -RescanVmfs |Out-Null
 $global:hosttwostate = get-vmhost $hosttwo |get-datastore $datastore;
 $global:hosttwostate = $global:hosttwostate.Accessible  }
if ($global:Hostthreestate -match "False") {Get-VMHostStorage -VMHost $Hostthree -RescanAllHba -RescanVmfs |Out-Null
 $$global:hostthreestate = get-vmhost $hostthree |get-datastore $datastore;
 $global:hostthreestate = $global:hostthreestate.Accessible  } 
sleep 120
$global:counter = $global:counter + 1
if $counter -eq 9 { $global:hosterror = "$datastore has been rescanned every 2 minutes for 20 minutes and is not available on all nodes of $cluster"
}
The last step once the loop has been terminated is to check if the error message has been populated - send an email out to the second level support team letting them know that automatic rescanning has not been successful.
if ($globbal:hosterror -ne $null) {Send-MailMessage -To $email -Subject "Unable to rescan ISCSI storage in cluster $cluster" -Bodyashtml -Body "$global:hosterror"  -SmtpServer "m.nobody.com" -From "VMware@nobody.com"}
I am hoping that you find this useful, as I have heard this is a very common problem, especially with Iscsi implementations. Leave me a comment if you have any questions or suggestions, or just leave a comment if you had a similar problem and solved it in a different way.

Wednesday, May 4, 2016

Powercli VM hardening script

Someone on the Linkedin Powercli Forum (a great group) asked if anyone had a VM hardening script.   I was working on one based on the output of our VROPs implementation.   This may not contain all of the settings available in the hardening guide,  but it did take care of most of the ones that VROPS was alerting on.  

One important caveat :   the vm needs to be shut down when you run this script, as all the advanced settings are locked while the VM is running.  


Param(
  [Parameter(Mandatory=$True,Position=1)]
  [string]$targetvm
)
$vm = Get-VM $targetvm
$vm  |New-AdvancedSetting -name 'log.keepOld' -Value 10 -confirm:$false
$vm  |New-AdvancedSetting -name 'isolation.tools.ghi.launchmenu.change' -Value false -confirm:$false
$vm  |New-AdvancedSetting -name 'isolation.device.edit.disable' -Value false -confirm:$false
$vm  |New-AdvancedSetting -name 'isolation.tools.hgfsServerSet.disable' -Value false -confirm:$false
$vm  |New-AdvancedSetting -name 'isolation.toolsautoInstall.disable' -Value false -confirm:$false
$vm  |New-AdvancedSetting -name 'isolation.tools.unity.push.update.disable' -Value false -confirm:$false
$vm  |New-AdvancedSetting -name 'isolation.tools.disk.Wiper.disable' -Value false -confirm:$false
$vm  |New-AdvancedSetting -name 'isolation.tools.ghi.protocolhandler.info.disable' -Value false -confirm:$false
$vm  |New-AdvancedSetting -name 'RemoteDisplay.maxConnection' -Value 2 -confirm:$false
$vm  |New-AdvancedSetting -name 'isolation.tools.vmxDnDVersionGet.disable' -Value false -confirm:$false
$vm  |New-AdvancedSetting -name 'isolation.bios.bbs.disable' -Value false -confirm:$false
$vm  |New-AdvancedSetting -name 'isolation.unity.taskbar.disable' -Value false -confirm:$false
$vm  |New-AdvancedSetting -name 'isolation.tools.diskShrink.disable' -Value false -confirm:$false
$vm  |New-AdvancedSetting -name 'isolation.tools.unity.windowContents.disable' -Value false -confirm:$false
$vm  |New-AdvancedSetting -name 'isolation.tools.unityInterlockOperation.disable' -Value false -confirm:$false
$vm  |New-AdvancedSetting -name 'isolation.tools.ghi.trayicon.disable' -Value false -confirm:$false
$vm  |New-AdvancedSetting -name 'isolation.tools.vixMessage.disable' -Value false -confirm:$false
$vm  |New-AdvancedSetting -name 'isolation.tools.ghi.autologin.disable' -Value false -confirm:$false
$vm  |New-AdvancedSetting -name 'isolation.device.connectable.disable' -Value false -confirm:$false
$vm  |New-AdvancedSetting -name 'isolation.monitor.control.disable' -Value false -confirm:$false
$vm  |New-AdvancedSetting -name 'isolation.tools.memSchedFakeSampleStats.disable' -Value false -confirm:$false
$vm  |New-AdvancedSetting -name 'log.rotateSize' -Value 1024000 -confirm:$false
$vm  |New-AdvancedSetting -name 'isolation.tools.unityActive.disable' -Value false -confirm:$false
$vm  |New-AdvancedSetting -name 'isolation.tools.getCreds.disable' -Value false -confirm:$false
$vm  |New-AdvancedSetting -name 'isolation.ghi.shellAction.disable' -Value false -confirm:$false
$vm  |New-AdvancedSetting -name 'isolation.tools.trashFolderState.disable' -Value false -confirm:$false

so I wrote this with the parameter -targetvm as a parameter. Then I can call it on any subset of machines I choose such as Get-folder dev |get-vm |foreach-object {./vmsecurityupdate $_.name} 

Most of the parameters above were recommended against "default build" VMs, so it is likely if you you ran the VROPs VM hardening alert you might see the same reccomendations. You may want more settings.. or maybe less depending many business factors. The easy way to plan your settings is to do a get-advancedsetting vmname |select *  and find out what setting are important to you or your organization.    My long term goal is to get this script into our build automation so every VM we push out would have an improved security posture.

I hope this helps out.

Friday, April 22, 2016

Creating a reactive alarm for ESXi ROBO cluster or as I call it "DRS-light"

I have decided to start blogging again after a long time away. Eight years to be precise.

The first item I want to share is a solution for a problem that occured in my company's Retail implementation that uses VMware ROBO licensing. For anyone that is familiar with ROBO -  you know that there is one major exclusion that makes cluster management challenging - and that is the lack of DRS. In any large scale implementation without DRS I think it is  fairly common to end up with unbalanced workloads after maintenance or outages.   This problem is compounded when you have a large support team of varying skill levels.

How I chose to address this problem was to create an alarm based on Host Memory Usage,  as Host memory is generally the first problem that occurs in our particular environment.  This methodology would also work for CPU constraints, but that is not a problem we had.

My starting point was the excellent article from the Powercli blog on using Powercli scripts in actions. 

One thing to note :  the syntax suggested in the article for the actual alarm action did not work for me  - so I used the following path to execute the Powershell code with the alarm :

in case that type is tool small to read -  I used the following to call Powershell
 (instead of the batch file method suggested in the original article) :
c:\windows\system32\WindowsPowerShell\v1.0\powershell.exe 


Here is the full code of the script I am using -   I will detail out the the purpose section by section (starting at line 1 as the rest is covered in the original blogpost by VMware pretty pretty well:
# In response to a host alarm, add a VM to that host.
# This is just for demonstration purposes.
# Find more info at http://blogs.vmware.com/vipowershell
$basePath = "C:\PS_SCRIPTS\Alarms"
$ProgressPreference = "SilentlyContinue"
$env:APPDATA = "c:\Documents and Settings\All Users\Application Data"

## Import the admin credential.
#. "$basePath\credentialManagement.ps1"
#$credential = Import-PSCredential "$basePath\systemCredentials.enc.xml"

# Log in.
Add-PSSnapin VMware.Vimautomation.Core -ea SilentlyContinue 
$WarningPreference = "SilentlyContinue"
Connect-VIServer localhost -User "somedomain/someuser" -Password "xxxxxxx"
$hostId = "HostSystem-" + $env:VMWARE_ALARM_TARGET_ID 
$vmhost = Get-VMHost -Id $hostId 
$cluster = Get-VMHost $vmhost |Get-Cluster 
$vm = get-vmhost $vmhost |get-vm |where {$_.name -ne "z*"}|sort-object memorygb -descending |select -first 1 
$destination = get-cluster $cluster |get-vmhost |where {$_.name -ne $vmhost} |sort-object MemoryUsageGB |select -first 1 
$destinationfree = ($destination.MemoryTotalGB - $destination.MemoryusageGB) 
$vmhostfree = ($vmhost.MemoryTotalGB - $vmhost.MemoryUsageGB) 
$vmsize = ($vm.memoryGB) 
$difference = ($destinationfree - $vmhostfree)
if (($difference - $vmsize) -gt 0) { Move-VM -VM $vm -Destination $destination -Confirm:$false} 
$count = $cluster |get-vmhost
$count = $count.count
else {Send-MailMessage -To "somepeople@somecompany.com" -Subject "Unable to Balance Retail Cluster $cluster - $date" -Body "Unable to balance Cluster $cluster due to insufficient resources available. There are currently $count Host(s) available in the Cluster."  -SmtpServer "m.somecompany.com" -From "vmware_team@somecompany.com" }

Now I will break down what the various lines of the script are doing :
$hostId = "HostSystem-" + $env:VMWARE_ALARM_TARGET_ID 
$vmhost = Get-VMHost -Id $hostId 
$cluster = Get-VMHost $vmhost |Get-Cluster
These three lines are taking the Alarm value ($env:VMWARE_ALARM_TARGET_ID) and converting it to a more usable form for Powercli commands.   In this case the alarm returns the hostId number, but without the prefix to query it using get-vmhost.  So the first operation I do is add the HostSystem- to the id to make it easier to query.   Then I retrieve the object for the vmhost and the cluster for future actions :
$vm = get-vmhost $vmhost |get-vm |where {$_.name -ne "z*"}|sort-object memorygb -descending |select -first 1 
The next objective is to get the list of VMs on the host that is having memory pressure  and sort it based on the most memory usage.   The line where {$_.name -ne "z*"} is not necessary in most environments, but in our case we have a guest that starts with z that is considered "immobile"  :
$destination = get-cluster $cluster |get-vmhost |where {$_.name -ne $vmhost} |sort-object MemoryUsageGB |select -first 1 
This next lines then find the host in the cluster with the most memory free and stores that variable for a later calculation :
$destinationfree = ($destination.MemoryTotalGB - $destination.MemoryusageGB) 
$vmhostfree = ($vmhost.MemoryTotalGB - $vmhost.MemoryUsageGB)
$vmsize = ($vm.memoryGB)  
Then the current Host free and VM guest memory usage, and difference between the source and destination host are stored as variables for calculations :
$difference = ($destinationfree - $vmhostfree)
if (($difference - $vmsize) -gt 0) { Move-VM -VM $vm -Destination $destination -Confirm:$false} 

Now all the collected variables are used to calculate if you should move the vm to another host. The If statement is used to make sure that you will not move a VM to another host with less available memory than the original host:
$count = $cluster |get-vmhost
$count = $count.count
Now we gather some data in case we were unable to move a vm (such as if there is no other node with more free RAM) :
else {Send-MailMessage -To "somepeople@somecompany.com" -Subject "Unable to Balance Retail Cluster $cluster - $date" -Body "Unable to balance Cluster $cluster due to insufficient resources available. There are currently $count Host(s) available in the Cluster."  -SmtpServer "m.somecompany.com" -From "vmware_team@somecompany.com" }
The last step is now to send an email to the support team with some context around the error message so they can investigate.   This is to cover in case a cluster is missing nodes.   

So that is my solution for balancing memory in a DRS-less ROBO environment  

If you have any thoughts or suggestions -  please comment.

Thursday, October 23, 2008

VMware EVC - incompatible ?

When installing some brand spanking new DL585 Quad Core systems I was unable to initially enable EVC for the new servers.   Both new servers were showing as having incompatible hardware.
EVC1
The answer was the No Execute Page Protection being disabled by default.  I was also surprised to find that the AMD Virtualization support was also disabled by default.   I also saw some posting in the VMware forum that other newer HP models have the same default setting.  Once the settings were adjusted,  EVC was no longer reporting incompatible hardware. 

Friday, September 26, 2008

VMware 3.5u2 Hardware Monitoring

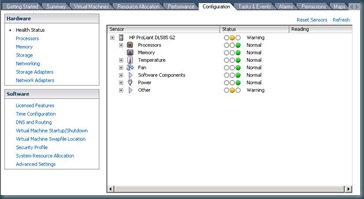
In the ESX 3.5u2 release notes there is a brief blurb about the display of system health information:

"Display of System Health Information – More system health information is displayed in the VI Client for both ESX Server 3.5 and VMware ESX Server 3i."

I don't think that blurb did this feature justice.  

HealthStatus

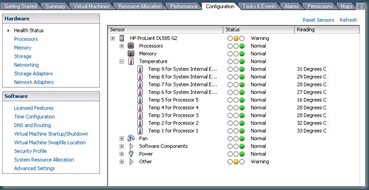
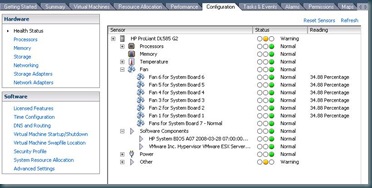
Expanding some of the nodes shows a surprising level of detail.

healthstatus2 

healthstatus3

I think VMware definitely undersold this feature in the release notes.  

Thursday, September 25, 2008

VMware Upgrade Manager - Using Baselines to Check Patch Compliance and Perform Remediation

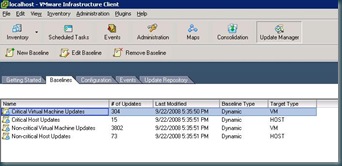
Patching servers or guests using VUM is based on application of baselines.  You can apply baselines at any level in the hierarchy of  Hosts & Clusters for Host based updates or at any level of the hierarchy of Virtual Machines and Templates for Guest based updates.   Baselines can either be static or dynamic,  and can be manipulated via the baseline tab of VUM.  In the screen shot below it shows the default baselines created by VUM,  which are all dynamically updated baselines.  

baseline14

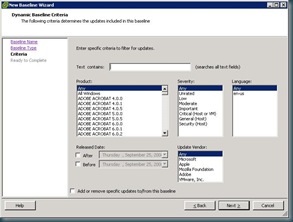
If you choose to create a new baseline you can customize it for Host or Guest Updates,  whether the baseline is  Fixed or Dynamic.  After selecting these criteria, this is where creating a baseline gets interesting.  You can select products, update severity, language, date range criteria, and which vendor updates your baseline will include.   Currently vendors include VMware, Microsoft, Apple, Mozilla, and Adobe.  That is a much larger list than I expected.     You can also choose specific updates to include or exclude on subsequent screens.  

 baseline15

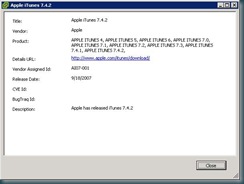
You can also check patch details from the subsequent inclusion/exclusion screen  (or from the update repository tab).  I chose this update in particular to display, because I was surprised to find in among the included updates. 

baseline16

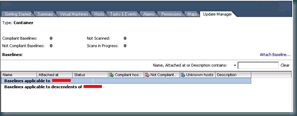
Now that we have created baselines or used the default baselines,  now it is time to attach them.   If you want to applying a baseline to an ESX host,  you would apply them in the Hosts and Clusters view of the inventory.   If you are choosing to apply guest based baselines then you would apply them in the Virtual Machines and Templates.   You can apply them at any container level within the hierarchy.   I chose to deploy our host based baselines at the datacenter level.

baseline4

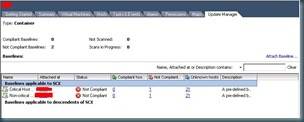
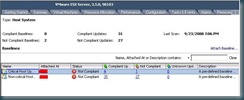
when you attach the baseline you will be asked to select which applicable baseline you wish to apply to the selected container.   Once the baseline is applied you will get a view that shows the number of hosts that are compliant with the baseline, the number that are not compliant,  and the unknown servers (which have not yet been scanned)

baseline6

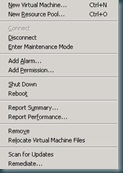
Now from each host (or guest) you will now have additional options in the context menu, Scan for Updates and Remediate.

baseline7 

before you scan for updates,  make sure that your update repository has already been populated.  When I scanned without a populated repository,  I received and error stating that  the scan could not be completed.  You can scan from any level in the hierarchy that has an applied baseline.  For the purposes of this blog, I scanned at an individual host level.  Once the scan has been completed, you will now see an updated screen showing you the updates compliance status based on your scan.

baseline8

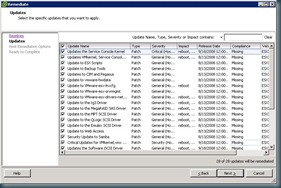
Now it's time to remediate.   clicking remediate will bring up a wizard, asking you to select the baselines that you will be applying.  and allows you to select include or exclude updates contained within the baselines. baseline11

Now you are asked for when you will apply the updates, and you can have an opportunity to adjust the default failure options.

baseline12

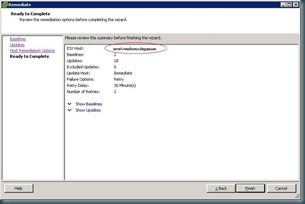
Normally I wouldn't publish a confirmation screen,  but there is one specific thing I would like to point out.   This is the only place in this wizard where you can see the scope of the update remediation.   Since this tool will try to force your servers into maintenance mode, including rebooting servers that are unable to enter maintenance mode (if you have selected that option),  it is good to confirm that the scope is limited to what you have intended to patch.  

baseline13 

You will now see a task for remediation on the selected hosts, and after it is completed, you will be able to see an event for each patch applied as well as events for entering maintenance mode, and rebooting the server.   

In my opinion the time spent configuring VMware Update Manager is time well spent, as it will save much more time in the long run.  It's very nice to see VMware follow in the footsteps of Microsoft SUS and WSUS in making a free patch management tool, as opposed to going in the direction of "paid updates" model.       

Tuesday, September 23, 2008

Configuring VMware Update Manager

As mentioned yesterday, in this post I will discuss how I have configured VMware Update Manager, and even show some of the options that I chose not to configure.  

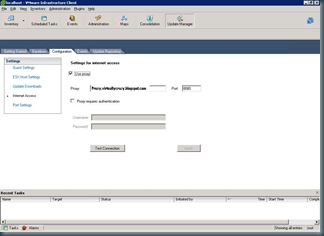
First configuration option that I set, and possibly the most important, depending on your network design was the proxy configuration.   Instead of redacting the server names, I will be replacing them with fake names.  One thing to take note of -  VUM does not support proxy auto-detection.  If you have a proxy, you will need to configure it here.

vum14

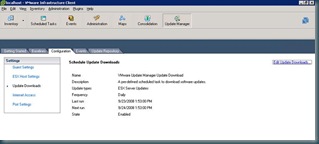
Once you have configured your proxy, you can go to the update downloads to configure what will be downloaded and when.

vum15

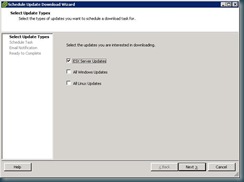
If you click on the Edit Update Downloads object, it will present you with a wizard for configuring which updates you want , and when it will retrieve them.   In our environment we already have a very good solution for patching all of our servers, so we will be only downloading ESX host updates. 

vum16

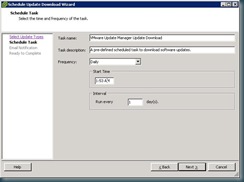
At this point you can set your schedule,  you can setup one time updates, at server startup, hourly, daily, weekly, and monthly.  At this time it appears that you can only have one update job per implementation of VUM, so plan accordingly.

vum17

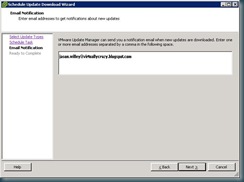
Now you can enter email addresses for people that you would like to be notified of new updates.

vum18

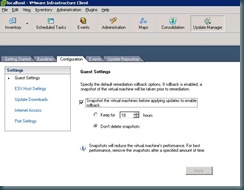
You can also configure options around guest and host updates.    You have the option to snapshot the virtual machines before applying the updates, allowing an easy fallback in the case of an virtual machine having issues from a patch update.   You can also choose to keep that snapshot for up to 100 hours, or to not automatically delete it.  

vum19

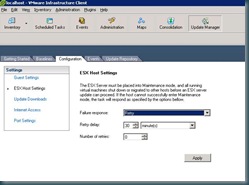
In the ESX Host Settings, VUM reminds you that host patches are only installed when an ESX server is in maintenance mode and prompts you for how to react to not being able to place the server in maintenance mode.   It can Fail the Task (writing an event),  Retry the job, Power Off and Retry, and Suspend and Retry. All the retry options include the   ability to limit the number of retries and insert a delay between retries.

vum20

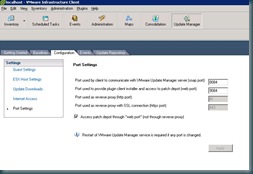
One last configuration screen is Port Settings.   If you had any need to change the ports that VUM is using to communicate, here is where it would be done.   I wouldn't recommend changing them unless you have a specific security requirement.

vum21

Now that you have VUM configured, you can check the Events tab for information on update downloads, scanning and updates to VUM configuration

vum22

One other support tool that is included on the server where you installed VUM is the Generate Update Manager log bundle tool.   This tool creates a zip file on your desktop with all the logs and configuration files for VMware Update Manager that you can either examine or forward on to your VMware support.   By default this icon is in the root of VMware folder under Program Files.

In my next post I will go over the VMware Update Manager repository and the information available there, as well as creating, editing, and using baselines.